About Stacks Guru
Stacks Guru is born from the need to search the vast number of videos out there on stacks built for Stacks Pro and the Stacks 5 plugin for Rapidweaver.
We have scraped over 500 videos to get the transcripts for each in order to make the spoken word searchable.
Please use this free tool to help you learn and discover the awesome power that Stacks and the stacks made for Stacks have to offer.
Stacks Guru
Video Reference
2011 09 14 weavercast ep9
07/25/2016
Transcript
00:07 hey everybody this Joe workman and thank you for joining today's podcast and today we're going to go over a few00:14 different things we're going to go over this a bunch of really great bundles out today and so we're going to go through
00:20 some of those and see how they can they can help you in your everyday workflow there's a lot of great stuff in there
00:26 for actually for web developers so it's very pertinent to our Weaver cast today after we kind of look at some of these
00:32 bundles i'm going to start diving into how to properly manage images within
00:37 stacks so that'll be a lot of fun so without further ado let's go ahead and jump into Safari and and look at some of
00:45 the bundles that are available today so the first bundle that we're going to
00:51 look at today is a the yearly bundle from Mac update it's a it's a great
00:56 little bundle um the two key pretty much main apps that are in this bundle are
01:02 toast in data rescue three now unfortunately i just bought data rescue three like two months ago so um you know
01:09 that really wasn't the selling point to me um and toast to be honest with you you know dvds and cds and even blu-ray
01:18 to me it it seems like old news I don't need an app that burned stuff if I
01:25 really wanted to go ahead and burn something I think OS tens features do
01:30 exactly what I need right I need data on a CD I don't really need to be burning videos onto CDs or DVDs to give to my
01:37 friends or families I don't really do that um but if you do do that you know toast titanium might be great for you
01:44 and you know make this bundled well worth it for you since the bundle is 50 bucks and toast itself is just is 9
91:52 right so but if you don't have data rescue three and you're looking for like a data recovery app um that is
01:58 definitely an awesome app i do recommend it i've owned it it's saved my butt a couple times recovering photos from
02:05 reformatted um you know st cards and stuff like that so I'm i definitely recommend data rescue three it has saved
02:12 my rear end um a couple other apps that are in there I've talked about istat menus in one of
02:19 my previous Mac tech casts um and it is definitely one of my favorite all time
02:24 you know apps and help wraps to kind of help me out um so check out my mac tech cast on istat menus great little app
02:32 definitely recommend it some of the other apps that are on this bunder pretty much they don't really tickle my
02:38 fancy phone view I actually own I use that from time to time it is a quasi useful app okay um effects Studio Pro I
02:47 have a lot of other apps like out there right I've analog app for meal mac software we have a flare from a famous
02:55 icon factory right um don't really need another app like that I don't think fantastical has been getting a lot of
03:01 fanfare lately for its awesome unique views of calendaring I myself haven't
03:09 jumped on the fantastical bandwagon yet I do love ical in Lyon and I've just
03:16 been using that to be honest with you and but you know if if you like some of
03:21 these apps this this is a great bundle I'm especially if you don't have a data rescue three and you're looking for
03:27 something like that or you're interested in interested in toast okay so great
03:32 apps um the next bundle is Mac Legion uh over at Mac Legion calm and this this
03:42 bundle is actually very very very very good it's got a lot of really good
03:48 top-notch quality apps in here and is arguably one of the better bundles I've seen in a long time the one app that
03:56 first threw me for a loop when I saw this bundle was devonthink pro now of
04:02 course it also has rapidweaver and if you know me I'm a avid rapidweaver fan
04:08 and user and develop for their platform so if you don't have rapidweaver I
04:14 definitely think you should check it out the price of this bundle more than you know is worth it rapidweaver is normally
04:20 eighty dollars you can get it today for fifty bucks in this bundle and you get a whole bunch of other great apps that go
04:25 along with it so a wrap Weaver is awesome app well this bundle is well worth it just for
04:31 that app but there are some really great other apps in here devonthink pro as i mentioned before is an app that I've
04:38 meant to look at for quite a long time um it's a you know but it's pricey I
04:44 think it's 99 99 and you know I've never jumped on the bandwagon yet but you know
04:51 with this bundle it spun its kind of you know made me think about it and it kind of pushed me over the edge you know I
04:57 can get devonthink pro 50 bucks along with some other great apps and I thought
05:04 it was worth it um it's pretty much kind of a digital drug drawer right where you
05:10 can just because he stuff everything in there and and so I'm gonna play around that maybe you'll see a webcast on it in
05:15 the near future um so so have a look and you know keep watch out for that um now
05:23 the next one kind of sexually surprised me banner zest pro um was traditionally
05:30 a flash only basically you can develop little flash widgets um you know nice normally photo slideshows or banners and
05:38 things of that nature for your website and its traditionally always been flash base so when I first saw it on on here I
05:44 was like yeah you know I don't know it's it's flash it is the icing greatest version 3 but its flash right I really
05:51 don't care I'm not going to use it but okay I i just happen to dig into it a
05:56 little bit further and notice that the latest version 3 that was just released which you get in this bundle actually
06:02 supports not only flash but also html5 so that's really really cool so on all
06:07 browsers that are support html5 you know banner zest will use html5 however it
06:13 will fall back gracefully to flash on unsupported browser such as our lovely
06:18 and tried and true internet explorer so um you know this is a great web
06:24 developers bundle a rapidweaver banner zest pro two awesome awesome apps okay
06:30 for web developers um you know I'm not another one corel painter I you know if you're a designer and you do some design
06:36 for your websites you know I it I'm not much of a designer myself you know I have other things like Pixelmator
06:43 and I've Air Corps a corn and I own photoshop elements so you know having
06:49 another painting program i I don't know i'll play around with it see if it has what unique features it has um and you
06:57 know but you know if you're looking for something like that great post box I love mail for Lion so probably not going
07:04 to be using post box too much another great little app that's in here that I thought was a great little addition pray
07:10 nap I wouldn't buy for myself but because it was a part of this bundle I'm happy to have it and that's the last one
07:16 on the list here is called foo me and through me is a really great little app that kind of creates these smoke like
07:22 colored smoke like graphics that could be great for you know website banners backgrounds and things of that nature so
07:29 I look forward to playing around foo me um I got you might see it on a future webcast here okay so um a collegian 5
07:36 bucks Matt collegian com awesome bundle the top notch apps here for me
07:42 rapidweaver banner zest pro devonthink pro and the first really knew the kind
07:48 of goody here is foo me for me some of these other ones will la check up disk drill pro i'll play around them that
07:55 there i'm sure they're probably great apps and i'll look into them disk drill pro from what i see is kind of a maybe a
08:03 contender to the data rescue three that we saw in the mac update promo so maybe
08:09 the mac allegiant promo really is the go-to bundle here um since disk drill pro kind of looks like it does some file
08:15 recovery as well so um great app great bundle on you gotta check out Mac Legion
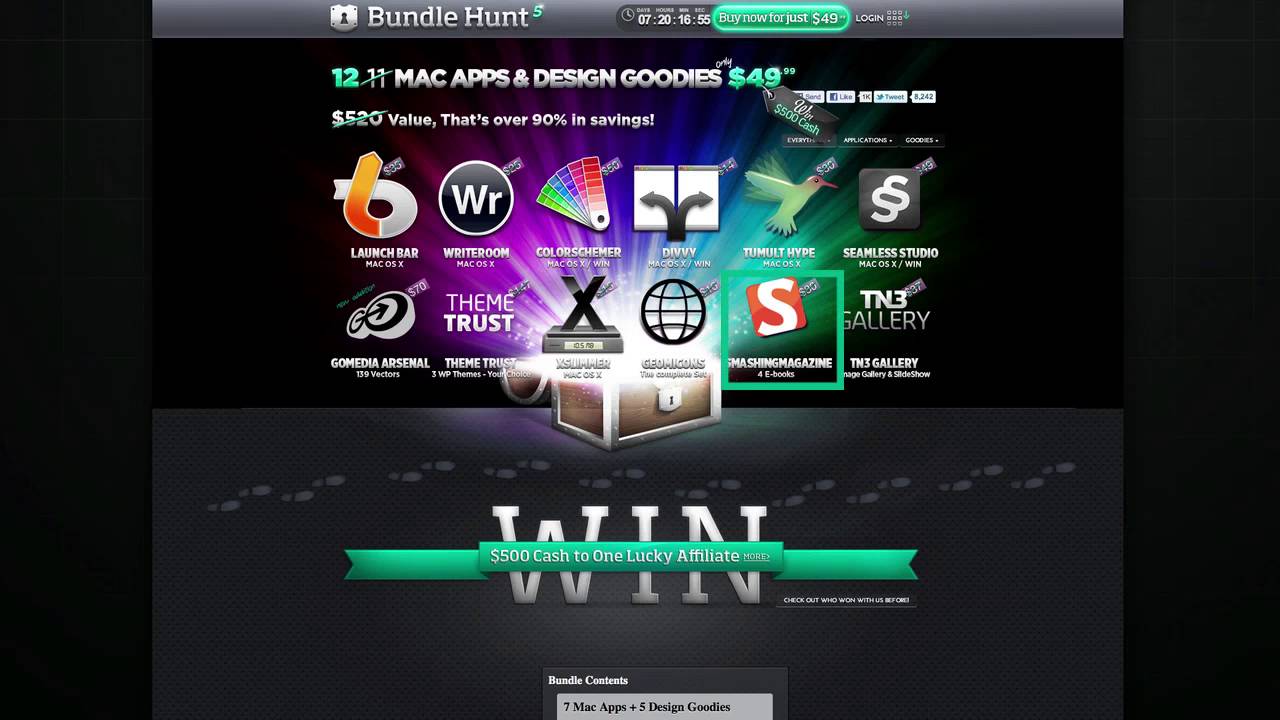
08:21 okay um now the next bundle that we're going to look at is another bundle that
08:27 I've purchased now I actually already owned probably a majority apps in this I
08:33 already owned launch bar already on right room already own color schemer already owned hype and already own
08:38 excellent okay um but the apps that work that I didn't own divvy looked quasi
08:44 interesting seamless studio was was a tickler it seemed definitely interesting to create you know from taking this as a
08:52 website right definitely a great tool to develop you
08:57 know tile backgrounds and things of that nature so um seamless to do look very interesting it was intriguing but that
09:04 out ballon didn't really bring it home for me uh jet standing on its own right um but if something else in the bundle
09:11 was intriguing to me then you know it definitely would push me over the edge so there were a couple other things in
09:17 here basically the icons so um there's two icon bundles in here I think a totally get like 400 icons um and some
09:26 of the icons I actually quite liked thought I could use them in some of my mac apps coming up so that this I'd like
09:33 smashing magazine they have some new ebooks coming out and i like the read books i've purchased their ebooks in the
09:39 past and I didn't have the ones that were here so um really those the
09:44 seamless studio the icons and the Smashing Magazine ebooks kind of brought this bundle home for me but okay launch
09:52 bar launch bar I've done a full-blown webcast on my mac tech podcast here um
09:58 so make sure if you haven't checked a launch bar check out my podcast and you can really see the power of launch bar I
10:04 use launch bar a thousand times a day um it's integrated into my muscle memory in
10:10 my fingers and I couldn't imagine a Mac without launch bar so um you know if
10:16 you're if you're looking for something like launch bar please check out my podcast watch it you'll fall in love
10:21 with it um fabulous app I think it's a the one app that should be on every single Mac in the world okay um color
10:29 schemer for web design it's it's indispensable tool for defining colors
10:35 finding what colors match with with uh directly with what with which other colors right so if you want to find
10:41 color schemes for your website you know plan out here's these are the colors I want to use for my links this is going
10:47 to be my text so on and so forth you can really kind of mix and match the colors and see which colors you know go with
10:53 what with what other colors right so the next great app here is hype now I plan
10:58 on doing in in the near future a full-blown webcast on hype itself okay and hi plows you to build on html5
11:07 um website graphics that you can easily integrate into rapidweaver ok now you
11:14 can build it all into you know into any other website right but um you know this is a great tool if you are rapidweaver
11:19 user type is a great tool for getting html5 animations not using flash
11:25 straight html5 web sites and integrate those nicely and seamlessly into rapidweaver so look in the future for
11:32 web cast on hype I think it's a great app I've played around with it for a couple months now and it's really really
11:38 slick so bundle hunt the bundle hunt bundle um I think it's a great Buy um if
11:44 you don't have some of these apps like launch bar or hype I think it's a no-brainer color schemer as well right
11:50 if you don't have those three apps right room is another great little text editor app ok I don't want to bend you know
11:57 belittle it I do own it I and I do use it so great apps there but I think
12:03 launch bar color schemer and hype those three apps especially if you are a web designer I think those apps are pivotal
12:11 to workflow ok now the last bundle here
12:17 is probably a lesser-known bundle and this is a bundle site called mighty deals that comes out with a mega bundle
12:22 from time to time and here they claim to have fifteen hundred dollars worth of creative items for only 15 but for only
12:29 50 bucks ok now i'm not going to go into each one of these but there is just a a
12:34 ton a plethora of of icons and images and PSD files and an audio loops and
12:43 templates for websites and and just a ton of creative content here now
12:51 purchases bundle in the past and the I've really loved the icons that I've got out of here I've used some of the
12:57 artwork on my website so you know while you I might not use everything that's
13:03 within this bundle I definitely get my money's worth out of it I think it's a great little bundle mighty deals calm
13:09 and you should definitely check this one out too especially for your web designer and any are you you know looking for
13:15 some some new graphics and things for your websites ok so that deep pretty
13:20 much deals with the four bundles that are currently out right now that i'm aware of at least i
13:26 will definitely make sure I put links to all of these in the show notes so uh you know I'll probably I have a couple of
13:32 philly URLs here so if you click on the affiliate URLs from the show notes I would appreciate it definitely helps
13:37 fund these great podcasts that that we have going on here for you guys so now
13:44 we're going to go and jump into the meat of this webcast and that's looking at
13:50 images within stacks so let's go ahead and do that so now I've got a blank
13:58 rapidweaver file open with stacks and let's go ahead and and how can we deal with images properly within stacks so
14:07 let's go ahead and add a default image stack to our stacks page and this is here I just have an image let's go ahead
14:13 an image into there now first thing if you notice we actually you can actually
14:19 drag an image directly into stacks and it will automatically create a stack image head or stack image in there for
14:26 you therefore you know you didn't actually have to drag in the stack stack
14:31 in there the image stack in there all you have to do is drag your image and it will automatically add an image stack
14:36 for you so a cool little shortcut for those of you that that had images into
14:41 your pages all the time which is probably going to be all of us right so let's look at the default kind of stacks
14:49 image hood and and show you exactly what we can do here okay so to get to the
14:55 image HUD as we all know every stack has eight and I and you click on the eye and you get this if this HUD here that it
15:02 basically allows you to add a border to your stack or change the background color margins padding in with right in
15:08 position okay however there is another special HUD for images that a lot of
15:14 people seen tenderness and what how you get to that is you double click on your image and while you'll notice is the
15:21 image will kind of open up and a gearbox will show up if you click on that gear we now see a HUD that is specific for an
15:31 image okay now this isn't just for the out-of-the-box image back this particular hood shows up in
15:37 any image drop area even in third-party stacks that we see across the stacks
15:43 community okay so if you see a little drop area like we see in you know like
15:48 we saw here um and you can add and drag and drop an image into a stack you can
15:53 modify this HUD and modify the images for uh you know that particular thing
15:59 easily within here okay now the first setting that we see here is scale okay
16:05 so we can scale the image a hundred percent definitely shows you you know a hundred percent of what that image is
16:12 there is a small caveat here that I will show you in a little bit so that we can go over that the next setting that we
16:19 have here is rotation so you can easily kind of rotate your you know image directly on the page so that you know
16:26 you can you know completely rotate an image do some image rotation so uh you
16:32 know nice little feature not exactly uh to be honest I'm not sure I've actually used image rotation at all I've pretty
16:40 much just used you know if I want an image you know rotate it'll probably rotate it outside US of rapidweaver
16:47 right but um you can then add a border now if you notice before this border is
16:52 different than the stacks border because it adds a border around your image now
16:57 an important point is here that this does not add a CSS border to your image it actually adds a border to your image
17:05 modifies the image and then the image itself that is deployed and published to
17:10 your website contains a border okay so this is a little bit different than adding a CSS border to your image um
17:19 next thing is shadows same thing here but you can add a shadow a nice drop shadow you can define the definitely you
17:27 know how opaque do you want the shadow to be you know the color of your shadows
17:32 the blur radius of your shadows okay the x and y offsets of that shadow now as
17:40 I've stated with the border this is not a CSS shadow this is actually adding a
17:46 shadow to the image and then when the image is published to your site that image will contain a
17:52 strop shadow it is does not use CSS or css3 at all okay you're actually
17:58 modifying the image within stacks the
18:04 last things you can add is file name so if you've noticed stacks kind of renames your files to stacks underscore some
18:12 unique ID dot PNG okay but if you want to give your file a name so I want to
18:17 make sure that it's called toolbox okay so when it's deployed it will be called
18:23 toolbox PNG okay and the final thing is the alt tag so the alt tag is definitely
18:28 helpful for SEO for search engine optimization it you know definitely adds you know if you hover over the image you
18:36 can see the the alt text there um you know a lot of JavaScript sliders such as
18:42 my new samurais dak will take the contents of the alt tag and then place
18:47 them and use them maybe as a caption I you know within the image things of that
18:52 nature so the alt tag is a is a common place where you can basically add you know a sentence um that you know
18:59 basically describes what that image is
19:11 so now I've noticed if you've heard me say that this file will be being called
19:17 PNG so one thing if we let's preview this really quick but as this previews
19:23 stacks will modifies all images so even if you drag in a JPEG of an image that
19:29 image once published will be turned into a PNG file so that is true if you use
19:36 the image stack okay that image will always be exported as a PNG file okay so
19:44 if we look at this image we can drag it out let's see there we go will notice if we drag this image out let's save it to
19:50 my desktop okay we see that the image itself has a border and it has a shadow
19:56 that proves us that this shows us that this does not use CSS at all for these
20:01 shadows or these attributes okay it does modify the image and when the image is deployed that image itself will contain
20:09 a border and a drop shadow okay now I told you I was going to get there was
20:16 one caveat here with the scale okay now let's say I had a really big image now
20:28 let's say I had a really big image this image was fifteen hundred pixels wide
20:34 okay stacks has a safeguard to kind of protect yourself from yourself and it
20:40 helps you not deploy such large images to your website because large images
20:47 hence means you know a bigger file size therefore means slower page load times
20:54 therefore if we go into the stack preferences for going to stack
20:59 preferences well notice that there's a
21:04 reduced large images settings okay and basically the default is 800 pixels by
21:10 800 pixels so stacks will always constrain the image to be no larger than
21:17 800 pixels wide or tall okay so if you drag an image that's fifteen hundred
21:24 pixels wide okay and then you you go and say hey but my I set my scale to be a hundred
21:30 percent the maximum width that at image will export at is 800 pixels okay so if
21:39 if you wanted to increase that if you're if you wanted to not protect yourself right you can definitely go in here and
21:45 say you know I want this to be 1200 x 1200 pixels okay save that and now our
21:54 maximum is 1200 pixels ok so now now if
21:59 we were to go and put this at one hundred percent now I I've I've played
22:04 around and I think you actually have to um if you add an image in and change
22:10 those preferences you can have to readd the image in for the the larger size to
22:16 take effect okay Joe so if if you have a 1500 or 1200 pixel image and you want
22:22 that in make sure you set your preferences first drag that image in set the scale to one hundred percent and
22:29 then you should be good to go okay so this pretty much goes over all the
22:35 basics of images right if you want to get a image on your page and that's it you don't really want to really do any
22:40 effects with it or you just you just want an image on your page this is perfect okay now there is another way to
22:47 get images on your page and that's actually through believe it or not a
22:52 text stack ok now a tech stack uses a style text area that is used all across
23:00 rapidweaver even on a rapidweaver style text page ok so I'm not going to go
23:06 through all the details here but you can definitely add an image directly into a text stack now when you do that and you
23:14 double click on an image you will get rapid weavers media editor this will
23:20 allow you to define the scale of your image the file name ok now if you notice
23:25 here the file name will be a JPEG so if you want to get it kind of get around stacks conversion to P&G you can
23:33 definitely you know use a style tech stack um and then you know you can set
23:38 the you can rotate it you can crop it you can flip your images you can add shadows and
23:43 borders and of course you can add a fill color but again these are modifying the images not adding CSS to your image okay
23:52 so if we go ahead and preview this we will notice that i have my image this
23:59 top one is centered okay we have the little styles that we added this bottom one is in a style tech stack okay that
24:07 because it is everything is aligned left it was aligned to the left so but if I
24:13 wanted to Center the image I basically select everything click on the center as if it was text preview our page and
24:23 we'll see at my image that I added into my style tech stack is now centered okay
24:29 so that's another second way to actually add images um within stacks and really
24:36 within any style text area within rapidweaver okay so even if you have a
24:42 style text page or maybe you have form loom that has a style text header and
24:48 footer okay you can add images directly into their you are not limited to just text so that's another little nice
24:55 little tip and trick okay um so now let's jump into some third party stacks
25:01 that allow you to basically take your images to the next level so here we are
25:07 on my website and if we go to the products page rapidweaver and if you'll notice I have a sub section here called
25:13 image if we click on that we can see a lot of stacks that can help us with images so let's just peruse through some
25:21 of these and I'll break out in a wrap waiver and show you a few of them but just to show you what kind of what else
25:26 is possible out there to pretty spiffy up your images and basically take your images to the next level okay now one of
25:34 the new ones samurai I mentioned earlier in this cast is a great really kind of a
25:40 banner where you can add all your images in there and have really cool transition effects between your images okay now you
25:47 can autoplay these so that it auto plays things on an interval and if you notice the all the CSS that
25:55 you see here it's all CSS and JavaScript it does not use flash ok now it's cool
26:01 about these all these 3d 3d animations now it's cool about these is all the 3d
26:07 animations do work in Safari and chrome ok and there is graceful fall back to
26:15 other animations your basic you know kind of gallery style animations um in
26:21 browsers that do not support 3d animations such as Internet Explorer or Firefox hopefully these browsers will be
26:29 up you know updated soon so that they do support 3d animations but as of right now Safari and chrome do so though
26:37 they're the only browsers that your customers will actually see these great awesome 3d transition effects ok so if
26:48 we go back some other great stuff that we have here on expose has it is an
26:54 awesome a lightbox for images scroll is a a great little slideshow um that lets
27:02 you easily scroll through images and we'll look at that I'm an image safe if
27:11 we will look through expose expose really quick we have expose image pro stack that allows you to easily and
27:18 dynamically load full resolution images so when you saw I clicked on that light
27:23 box it actually dynamically downloaded the full resolution image therefore the
27:28 page load time was faster so that you know the customer can see your image in
27:33 full high-resolution style ok and what's great is expose will adjust the size of
27:39 your full resolution picture to really fit within the web browser so even if
27:44 your customers are viewing your website on their iPhone or their iPad the image will adjust its size dynamically so that
27:52 the customer can see the entire image
27:57 the scroll stack is a great stack that we have here to allow a basic little great little
28:04 you know scrolling images so you can have a kind of ate a quasi sliding scrolling of your images okay you can
28:11 add shadows and add various effects you can add hover effects you can add full-blown links to your images as well
28:19 um the next one is image safe now this is actually a really powerful tool and
28:25 to demonstrate image safe I'm actually going to go ahead and preview this in rapidweaver so here we have a blank
28:31 rapidweaver file and I'm going to go ahead and add an image the same image to our stack page again and if we go ahead
28:39 and preview this page we will have our image if you notice it's just a straight image and one of the things that um is a
28:46 caveat with any website okay is if you add an image to a page pretty much any user can copy that image if they want it
28:54 they can get it okay all they have to do is simply drag and drop the image onto their desktop and they have your image
29:01 it's as simple as that you can also right-click if we were in a browser they could right-click and say save image as
29:06 right okay but how can we stop that let's say I have an image that um I
29:12 don't want people to really be able to easily copy okay that's where image safe comes in if we open up and let's bring
29:22 on image safe okay I'm going to go ahead and add this image and image safe now if
29:28 we preview this okay we see I have my
29:33 image twice i have my normal image here which as you see i can click and drag and copy it off the website and I've
29:40 image safe now if you notice i am actually clicking here but i cannot copy
29:47 this image okay even if i open this in safari let's go ahead and preview this in safari so if we preview this in
29:54 safari if I right click on the top image we'll see i have save image to downloads save image as i had image to iPhoto
30:01 library right there's all kinds of options here because Safari knows hey this is an image okay however if we
30:08 right click on the image below that is protected with image safe we will see that those options do not exist ok so
30:17 this great way to help protect your images now this this isn't a foolproof way on
30:23 there really is no foolproof way on the web to protect your images if you have a
30:28 user that is extremely smart and web savvy and can dig into your HTML and CSS
30:34 code they will find the image ok but this basically adds a level deterrent
30:40 for you know probably ninety nine percent of the people out there that you know they cannot just drag your image
30:46 off and copy your images from your website ok now image safe auction I'll
30:52 actually has a bunch of great other features as well as you know protection
30:58 it allows you some really basic styles for your images so you can add border radiuses to your images ok so let's say
31:06 we wanted to add a a 10 pixel border radius and what's cool is you can add a
31:11 border radius different for every single side so let's say we wanted that the top
31:17 left to be 9 we wanted the top right to be three the bottom left to be 10 and
31:24 the bottom right to be three ok so you
31:30 can also add shadows so if I want to end now this is CSS shadows here this isn't actually modifying the image at all so
31:37 if you want to add a six pixel shadow with a slight offset of six and three ok
31:45 if we go ahead and preview this will see
31:51 that oops now let's go ahead and adjust padding a little bit here let's make our
31:58 padding a little bit bigger so that we can see our cool new shadow ok so you
32:05 see I do have a great new shadow of my stack I have rounded corners these are
32:11 10 pixels over here and these are three pixels over here i have my shadow ok and
32:17 all of it works perfectly ok we can change the shadow color if we wanted it
32:22 to be let's say we wanted a dark shadow ok and we want to
32:30 see the shadow size to be a little bit bigger okay own this let's read let's
32:37 reduce these to be like two pixels and four pixels okay preview that now we
32:50 have a kind of a more realistic shadow that you're more used to seeing right the work we have a darker shadow that
32:56 that has a blur radius of 10 pixels it's offset by a few pixels on the bottom a
33:01 top okay and we have our rounded our rounded corners okay now some other great features of this image safe stack
33:08 are you can actually show the shadow and hover okay so let's go ahead and check that and I'm going to do one more thing
33:15 this bottom setting is is really cool okay protect all images on the page now
33:20 if you notice when I check this there is a warning that goes on there because um it while image safe does its best to try
33:31 to protect all images on your page it is possible that some images um it won't be
33:38 able to protect it depends on how you know images in that particular image in the theme how its implemented or how
33:46 some images and other third-party stacks are implemented so test this out on a page check this box are key no can I
33:53 protect all images on this page okay um now this since this is pretty much a
33:59 quasi I can't guarantee it'll work if you come to me and say hey Joe um you
34:06 know I used it with this stack this other stack that creates his gallery and it it doesn't work sorry okay um I I I
34:16 don't have control over every third party developer stacks and and or themes so while this stack does its darndest to
34:24 protect all images on your page it will protect any you know regular non regular images easily so if we go ahead and
34:31 check that and then we go and preview this page this top image that is on the page that we were able to copy before if
34:38 we look we're not able to copy it any longer okay so just by checking that box we're able to protect
34:43 the images that are on the page also like this image this my toolbox protected on my page okay so this is a
34:51 great utility stack for images that allows you to add you know rounded
34:57 corners to your images add drop shadows if we notice here oh I took that you
35:02 know shadow on hover option so if we hover over the image we have our drop shadow okay and probably the most
35:09 important feature is what its main feature is is it protects your images from people visiting your website and
35:15 stealing them now I have a bunch more image stacks here and I'm not going to really go through all of them here but
35:21 please go ahead and visit my website Joe work with net / rapidweaver click on the image section and you will see all the
35:28 awesome image stacks that we have available we have some great hover effects some great revealing and adding
35:35 reflections to your images you know great light boxes and zooming effects so
35:40 please go ahead image galleries please go ahead and and peruse through our image section and he will see some
35:46 awesome effects to really make your images pop on your website well that's
35:52 about it everybody um you know I'm going to call it a wrap for today thank you for joining I appreciate you watching
35:59 and listening with my podcasts I I hope that you enjoy these i really enjoy
36:04 giving them and you know please you know send me feedback let me know what i'm
36:09 doing right what i'm doing wrong give me ideas on what you want to learn okay because I'm to ultimately doing these
36:15 for you um you know I want you to be able to learn and improve and make your websites great right just as if you
36:22 purchased any money installers right I ask you please use my stacks and go forth and make your website great so you
36:28 know that's what I asked you to do now go ahead and make your websites great um if you want some more information go
36:34 ahead and check out my website Joe workman net you can follow all my podcasts in itunes in get those feeds at
36:41 podcast Joe workman net and last but definitely not least check out my blog where i post tons of great tips and
36:48 tricks not only for web design but also just mac and technology in general so you can check me out my blog at joe
36:55 workman net / blog well thank you very much everybody i hope you enjoy the show again and we'll
37:01 see you next week bye"}]
Search the page
0
