About Stacks Guru
Stacks Guru is born from the need to search the vast number of videos out there on stacks built for Stacks Pro and the Stacks 5 plugin for Rapidweaver.
We have scraped over 500 videos to get the transcripts for each in order to make the spoken word searchable.
Please use this free tool to help you learn and discover the awesome power that Stacks and the stacks made for Stacks have to offer.
Stacks Guru
Video Reference
Cycler 3 Stack by Joe Workman
07/25/2016
Cycler is going to quickly turn into one of the most utilized slider stacks in your arsenal! Cycler allows you to easily create elegant content sliders for your Rapidweaver site. Cycler will hold any type of content that you would want: Text, Images, Videos and mixed content. For more information on the Cycler Stack for RapidWeaver check out https://joeworkman.net/rapidweaver/st...Cycler is going to quickly turn into one of the most utilized slider stacks in your arsenal! Cycler allows you to easily create elegant content sliders for your Rapidweaver site. Cycler will hold any type of content that you would want: Text, Images, Videos and mixed content.
Transcript
00:07 hello everybody this is Joe workman and00:09 today I'd like to introduce you to the
00:11 third generation of the new cycler stack
00:14 with the latest version 3 update of the
00:16 cycler stack it has really become one of
00:19 the most powerful and versatile sliders
00:21 out there let me show you why when you
00:25 add cycler to your stacks page you'll
00:27 notice like most stacks there's a drop
00:29 area to add things now if you're
00:32 familiar with the previous versions of
00:34 cycler there used to be the concept of
00:37 slides where you'd have to define the
00:39 number of slides all that has been
00:41 thrown out the window if you want slides
00:45 all you simply need to do is drag and
00:48 drop stacks directly into cycler and
00:54 like magic I have created three slides
00:57 within cycler now this is great because
01:00 now we are not limited to a certain
01:02 number of slides you can add as many
01:04 slides as you like within cycler another
01:07 great benefit is if I want to make this
01:09 particular slide on the top all I have
01:12 to do is drag it up so slide reordering
01:15 is now a cinch now cycler does work
01:18 fully functional out of the box so as we
01:20 see all I've done is added a few images
01:22 four slides and if we preview our web
01:25 page well notice that we have a fully
01:28 functional or slider
01:31 now another feature that really sets
01:34 cycler apart from everything else is
01:35 that I can handle more than just images
01:38 since stacks has some great layout tools
01:41 why not utilize those so as we see here
01:44 I've really enriched my content by
01:46 having not only images but by adding the
01:49 two columns with a header some text and
01:52 then the images over here and if we
01:54 preview that it works perfectly so now
01:57 that we're not limited to just images
01:59 you can really expand your horizons and
02:02 what you can include within your banners
02:05 another great thing that psycho does is
02:07 that it really leverages the
02:08 out-of-the-box tax settings if you want
02:11 a background or border or rounded
02:13 corners on your slider all you have to
02:15 do is use the default stack settings to
02:17 do that so as we see I've added a tiled
02:21 background image I've added a slight
02:24 border as well as some rounded corners
02:27 and a little bit of padding so that
02:30 there's some spacing between the slides
02:32 and the edge of the slider now what's
02:35 great is we just built a beautiful
02:36 slider and I haven't touched any of the
02:39 cycler settings at all all of this is
02:41 done with the out-of-the-box stack
02:42 settings so let's have a look at the
02:45 cycler settings to see really how we can
02:47 unharness some of its power under the
02:50 cycler layout settings we have the
02:53 ability to make the cycler slide a fixed
02:55 height we can also add a drop shadow
02:58 which really makes our slider stand out
03:01 now if you're going to add a drop shadow
03:03 you're going to want to make sure that
03:05 you increase your stack margin just a
03:07 tad so that the shadow doesn't get cut
03:09 off there's also a collapse in edit mode
03:12 setting that allows you to really just
03:15 preview exactly what your slider is
03:17 going to look like with in edit mode now
03:21 under cycler slide transitions there are
03:23 a large number of X out of the box that
03:25 you can choose from now if you click on
03:28 advanced effect settings you'll see that
03:30 there are a lot of great settings to
03:32 really customize the effect to your
03:34 liking we have things such as start at
03:37 slide numbers how long do you want to
03:39 pause at the slides and animation speeds
03:43 in and animation speeds out
03:45 and really some great easy options now
03:49 these are going to be a lot of fun for
03:50 you to play with let me show you one of
03:52 my favorites to start off with it's
03:54 called ease out bounce now you notice
04:01 the ease out bounce effect really adds
04:03 to our our effect and gives us that nice
04:06 bounce effect there are tons of really
04:08 these add-on effects to our main effect
04:11 that really can make your your slideshow
04:14 and your slider pop on your website and
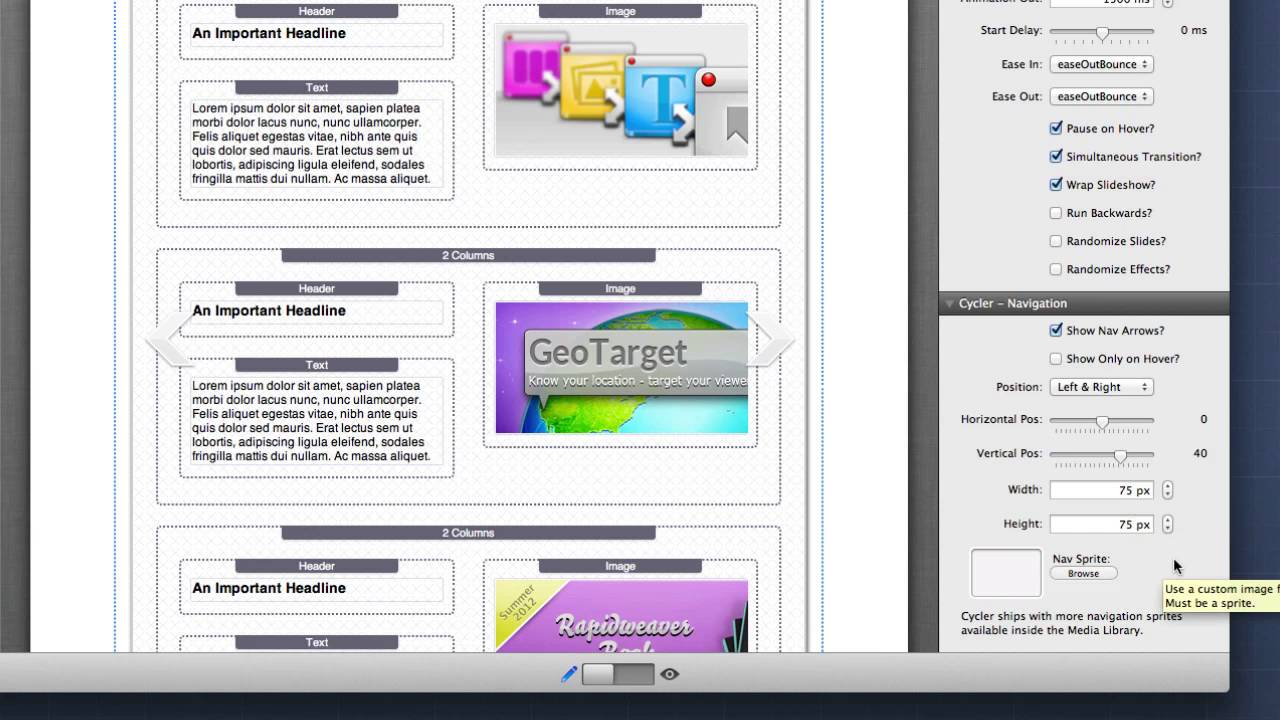
04:16 really stand out so the next thing that
04:19 we might want to add to cycler our
04:20 navigation arrows so that our users can
04:23 navigate from slide to slide to do that
04:26 click on shown a veros in the notice in
04:30 edit mode that we already have default
04:33 navigation arrows displayed for us now
04:36 in the settings available here we really
04:38 have a lot of flexible control on
04:40 positioning of these arrows so do we
04:42 want the errors to be inside of this
04:44 slider do we want them to reside outside
04:46 do we want them on the top and the
04:48 bottom or the left and the right okay
04:51 there are really a lot of options here
04:53 and you can also provide your own custom
04:56 navigation arrows where you can drag
04:58 your own navigation sprite and define
05:01 the width and height of each arrow so
05:04 that you can really customize this to be
05:05 your own now cycler ships with the ton
05:08 of great assets already built into the
05:10 stacks media library for you if you go
05:14 to our stacks media library you notice
05:16 that we have a default set of bullets
05:18 and navigation arrows both horizontal
05:21 and vertical to choose from these are
05:24 professionally designed images that are
05:26 ready to be displayed on all your retina
05:28 devices another thing that's great is if
05:31 you want to use these the width and
05:33 height settings are baked into the image
05:35 name for you so to use any of these you
05:37 just select the one that you want and
05:39 drag it into the navigation sprite and
05:41 that's all it takes to add great
05:43 navigation to your cycler now a quick
05:47 hint if you want to have your navigation
05:49 arrows outside of your cycler then
05:51 you're probably gonna have to increase
05:53 the stack margins on the left and right
05:55 sides to
05:57 about the same size as the actual
06:00 navigation arrows this way they won't
06:02 get cut off now out of the box cycler
06:06 supports both keyboard navigation as
06:08 well as touch navigation for mobile
06:11 devices now if you would like to
06:13 customize the way cycler does these
06:15 navigation elements you can actually
06:18 customize it with in the navigation
06:19 settings as well so the last thing that
06:22 we need to add to cycler is the pager
06:24 and we have some great options available
06:27 here for you we have the ability to have
06:30 numbers custom CSS bullets and your own
06:37 custom image bullets now you have full
06:44 control over the entire style elements
06:46 of your pager for numbers we can change
06:49 the size the borders the background
06:51 colors on the text shadows do you want
06:54 to add a drop shadow to it right for CSS
06:57 bullets we can again we have full
07:00 customizations over the background color
07:02 the active color the hover color some
07:06 really great offset some rounded corners
07:08 do we want them round circles or do we
07:11 want them squares okay so we can really
07:14 tailor to look and feel of our website
07:16 now just like the arrow navigation when
07:19 you select image bullets you have the
07:21 ability to add your own bullet sprites
07:24 into the cycler stack now cycler again
07:28 has provided a whole bunch of
07:29 out-of-the-box one's for you to utilize
07:31 better reside within the stacks media
07:33 library that we saw earlier now one
07:36 feature that is common across all the
07:37 pager elements is the elaborate
07:40 positioning system again not only like
07:42 the navigation arrows can you move the
07:44 bullets to the outside of the stack or a
07:46 little bit up or down or to the left to
07:49 the right or whatever you can actually
07:51 position them in over ten positions
07:53 throughout cycler now commonly you'll
07:57 have them at the bottom right-hand
07:58 corner but what if you'd like to have
08:00 them yes on the right side but actually
08:02 going vertically okay and as you see
08:05 there are tons of available options here
08:07 to where you actually want to place your
08:10 navigation bullets
08:12 now before we go I wanted to show you
08:14 the actual responsive feature set within
08:17 cycler and what's great is you have to
08:19 do absolutely nothing to enable it it
08:22 just works so if we look at this web
08:25 page will notice that as we resize the
08:27 browser the cycler actually dynamically
08:29 adjusts to the width of the browser now
08:33 ultimately this is done by placing
08:35 responsive content within cycler so
08:39 let's have a quick look on how this page
08:40 was created now I'm not going to go into
08:43 great detail here but cycler in itself
08:46 is a great responsive container however
08:50 even though the container itself the
08:53 cycler container itself is responsive if
08:56 you want the content of cycler to
08:58 actually respond as well to the width of
09:01 the browser you have to add responsive
09:04 content to it therefore in the sample
09:07 that we just saw I used my responsive
09:09 layout to column stack a fluid image
09:12 stack in the first column and text in
09:16 the next column what this allows us to
09:19 do is once the cycler stack compresses
09:22 down to an iphone level to a very narrow
09:25 browser instead of having two columns we
09:28 saw it actually shrank down to a single
09:30 column so that the text was actually
09:32 below the image so this is how we
09:35 accomplish responsive content within
09:38 cycler so I really hope you enjoy cycler
09:41 I hope it's going to be a stack that you
09:43 use in every single one of your web
09:45 projects I know that I love it and I
09:48 know you'll love it too so thank you
09:50 very much everybody have a great day bye
09:52 bye
09:54 you"}]
Search the page
0
