About Stacks Guru
Stacks Guru is born from the need to search the vast number of videos out there on stacks built for Stacks Pro and the Stacks 5 plugin for Rapidweaver.
We have scraped over 500 videos to get the transcripts for each in order to make the spoken word searchable.
Please use this free tool to help you learn and discover the awesome power that Stacks and the stacks made for Stacks have to offer.
Stacks Guru
Video Reference
DispatchDropbox
07/25/2016
Transcript
00:05 hello everybody this is Joe workman and00:08 today I'd like to introduce you to the
00:10 new dispatch to stack for Dropbox The
00:14 Dispatch stack allows you to add
00:15 beautiful file upload forms to your
00:17 website there could be a lot of great
00:20 uses for this whether it's exchanging
00:22 vows with your customers or maybe
00:24 handling a monthly photo contest so your
00:27 contestants can upload their photos to
00:29 your service let's jump on in and see it
00:32 in action so I have a dispatch form here
00:36 and all I'm going to do is I have two
00:38 images here that I'm going to drag and
00:39 drop directly on here now that
00:42 drag-and-drop functionality is only
00:44 supported currently in html5 browsers
00:47 essentially that's all the latest
00:49 versions of the major browsers out there
00:51 with the exception of Internet Explorer
00:53 that looks to become an Internet
00:55 Explorer 10 so we can't wait for that
00:58 now once we have added our files into
01:00 the file Q we can go ahead and click the
01:03 upload button as you see these were
01:07 really small files they uploaded
01:09 extremely fast but on you'll notice that
01:12 the ones they were completed the
01:15 background color changed to green and we
01:17 got a nice completed message now let's
01:20 jump on in and look at some of the
01:22 dispatch settings now setting up your
01:26 Dropbox account within dispatch is
01:27 really simple however it's also a little
01:31 bit different there really is only one
01:33 setting inside the stack settings for
01:36 dropbox and that is the actual folder
01:39 destination where you want the file to
01:41 be uploaded so you know / would
01:44 obviously be the top level of your
01:45 Dropbox directory if you put a folder
01:48 named in here in here then it would
01:49 upload all the files to that particular
01:52 folder now the folder does need to be
01:54 created before um you know files can be
01:57 uploaded so make sure that you actually
01:59 create that folder first so actually how
02:03 do we authenticate Dropbox with my
02:05 account then once you publish your
02:07 dispatch page to your web server you'll
02:09 notice a link that says click here to
02:12 finish stack set up
02:13 when you click this link it will
02:16 redirect you to dropbox com where you
02:19 will login and grant access to the
02:22 dispatch stack to your dropbox account
02:26 once you grant access you'll get a
02:29 confirmation and a test file will
02:31 actually be added to your dropbox
02:32 account on you can go ahead and check
02:35 for this file it's called dispatch test
02:38 and that you know authenticates that you
02:41 know everything is set up properly visit
02:44 your web page again you shouldn't see
02:46 this message at all again and your
02:48 dispatch stack should work properly so
02:51 let's go ahead and jump in and look at
02:53 some of the other awesome stack settings
02:54 for dispatch now if you are familiar
02:58 with version 1 of dispatch you probably
03:00 recall that it really was just meant for
03:02 uploading files however we've really
03:04 taken your feedback and I'm glad to say
03:07 that dispatch to now supports full blown
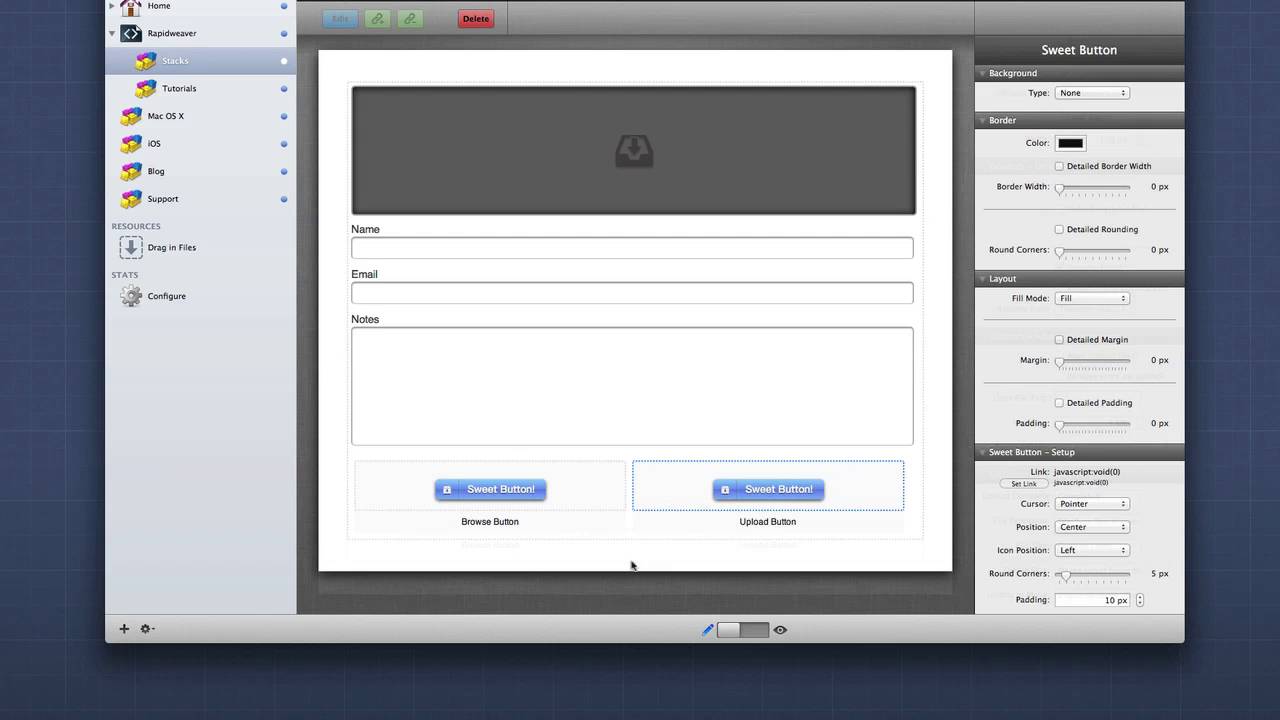
03:11 form fields so that not only can you get
03:15 files from your customers but you could
03:17 also get their name and email some notes
03:20 and also have a passphrase or human test
03:23 so that you know you can really control
03:25 who's uploading files for you now you'll
03:29 notice as I added these fields to my
03:31 form that a bunch of settings were
03:34 revealed we can require fields and then
03:38 also give a a full-blown validation
03:41 error if that field is not provided by
03:43 the customer you can also if you don't
03:45 want to use my out of the out of box
03:47 labels let's say you want to have um you
03:51 know it's a class you know what class
03:53 are you in okay and this is you know
03:57 what's your address or something of that
04:01 nature you can customize these forms to
04:03 really suit your needs so if we look at
04:06 the passphrase field it really has
04:08 become a dual purpose field now a by
04:11 default it is a password field so that
04:13 you can define a password and then users
04:15 have to type in that password in order
04:18 to upload a file now what's really nice
04:21 is that this is actually a password
04:23 field we can go ahead and as you see as
04:25 we type it now is
04:27 the text is now hidden just as if it was
04:29 a password however if you didn't want to
04:33 use it as a password let's say we wanted
04:35 to use it as a human test you can go
04:37 ahead and uncheck that use as password
04:39 then you can simply change the label to
04:41 say you know what is one plus one of
04:45 course then you would put your answer as
04:47 to now by clicking on custom field
04:50 styles you'll notice that we now have a
04:53 plethora of ways to really style the
04:56 actual fields to our liking now one
04:59 other setting is split form if you click
05:02 on split form you'll notice that
05:04 actually the form and the file field Q
05:07 are now separated and what's great is
05:11 this also supports full responsive
05:13 design so that if this form were on a
05:16 iphone or a smaller with device it would
05:19 actually respond so that it shrink it
05:22 would shrink down to one column instead
05:24 of being too now the next settings group
05:27 allows you to really customize the look
05:29 and feel of the file Q this is the drop
05:32 area that contains all of the entries
05:34 that are going to be uploaded to our
05:35 service moving on will notice that the
05:38 next section deals with button Styles
05:40 here you can change the labels the size
05:43 and the coloring of the buttons now
05:47 these buttons that ship with dispatch
05:49 are nice they are rather plain so we
05:53 actually gave you a great ability to use
05:56 any button stack within dispatch to do
05:59 that simply go to button style and say
06:02 use button stack when you select this
06:06 you'll notice that there are two drop
06:08 areas inside this fees drop areas is you
06:11 can place any button stack that you like
06:14 I obviously recommend my really powerful
06:17 and flexible sweet button stack now in
06:20 the last couple settings groups is where
06:22 the real fun happens dispatch has a
06:25 bunch of action settings that you that
06:28 can be triggered once an upload is
06:30 complete you can redirect to a specific
06:33 URL and you can specify actually a
06:36 special effects stack to be launched or
06:39 unveiled
06:40 the next option allows you to upload a
06:43 meta file along with the actual file
06:46 that the customer uploaded this metafile
06:49 is a text is a plain text file that
06:52 contains all of the data that the user
06:55 typed into the form now this metadata
06:59 file is actually named the same exact
07:02 name as the file uploaded with a dot txt
07:05 extension after that you can also send
07:11 an email this is great because now users
07:14 can upload data to your service and then
07:16 you will get an email once they do now
07:20 that email will contain not only the
07:22 name of the file but also all of the
07:24 contents of the form that the user typed
07:27 in now the last feature set in on upload
07:31 complete is the ability to rename files
07:35 this is great because if your customer
07:37 uploads a file with the same name that
07:39 maybe someone else had already uploaded
07:42 dispatch will actually take care of that
07:44 and rename the files so that no files
07:47 will get deleted or overridden by
07:50 accident now we have a an extensive set
07:53 of rename rules where you can maybe app
07:55 end of the date and time stamp of the
07:58 actual upload time you can append a
08:00 unique ID and you can also actually take
08:03 the input fields from the form that the
08:06 user typed in and rename the file to
08:09 contain those fields now in advanced
08:14 forum logic we have the ability to auto
08:16 upload files what this means is as soon
08:19 as a file is added into dispatch it will
08:23 automatically be uploaded to your
08:25 service the user does not need to click
08:27 upload it will automatically be sent you
08:32 also have the ability to limit file
08:33 extensions this is a comma delimited
08:35 list of file types so if you wanted to
08:38 accept only images you could do jpg
08:41 comma PNG comma and all of the other
08:45 formats okay um you can define a max
08:48 size so the maximum size of the file
08:51 that you want to be allowed to be
08:52 uploaded and of course the
08:54 number of uploads so how many
08:55 simultaneous uploads do you want to
08:57 limit a user from uploading at one time
09:00 well thank you very much for watching
09:02 everybody I hope you enjoyed the new
09:04 dispatch stack it's a really amazing
09:07 update a lot of blood sweat and tears
09:09 went into this one so go out and make
09:11 your websites great thanks everybody bye"}]
Search the page
0
