About Stacks Guru
Stacks Guru is born from the need to search the vast number of videos out there on stacks built for Stacks Pro and the Stacks 5 plugin for Rapidweaver.
We have scraped over 500 videos to get the transcripts for each in order to make the spoken word searchable.
Please use this free tool to help you learn and discover the awesome power that Stacks and the stacks made for Stacks have to offer.
Stacks Guru
Video Reference
Total CMS Implementation Walk-thru Part 2
07/07/2016
More about CMS for RapidWeaver: https://cms.joeworkman.net/ In this 3 part video series we extend the project created in our Getting Started with Foundation video series by integrating Total CMS and Blog into it. This video series does not dive deep into all of the settings for the CMS, however, it will give you a nice general overview of how it can be implemented. Part 1: • Total CMS Impleme... Part 3: • Total CMS Impleme... Project File Download: http://jwurl.net/29LUltU Getting Started Video Series: • Getting Started w... More about CMS for RapidWeaver: https://cms.joeworkman.net/ In this 3 part video series we extend the project created in our Getting Started with Fou
Transcript
00:00 getting started with CMS part 2 hey00:10 everybody
00:10 Joe workman here and in this video we're
00:12 gonna continue where we left off in
00:14 video 1 so in video 1 we created the
00:17 admin interface and we populated this
00:20 CMS with all the data from our website
00:22 we're gonna take that content and apply
00:24 it directly inside rapidweaver
00:27 so here we are now on the home content
00:30 page right so this is gonna be art the
00:33 home page for the website now as you see
00:35 it contains all of the static data that
00:37 we had previously so what we're gonna
00:41 want to do is first and foremost we need
00:43 to add the CMS core content stack to our
00:47 page now I'm gonna want to add this to
00:49 all of my pages so what I'm gonna do is
00:52 I'm actually gonna add it directly to
00:53 the footer partial on the page now you
01:00 may wonder why did I add it to the
01:02 footer and not the header well um the
01:04 CMS core stack contains a little cheat
01:07 sheet for all the macros that we could
01:08 use inside our project files and I like
01:13 to have that data displayed so if I ever
01:14 need a reference it I can easily see it
01:17 and if I added that to the top of my
01:19 page it could get a little bit annoying
01:22 so what I did is I added it to the
01:24 footer because the CMS course stack
01:27 really can be added anywhere you want on
01:28 the page it is intelligent and it will
01:32 put this stuff where it needs it but
01:34 having at the bottom I can always scroll
01:36 down and view the macros whenever I need
01:38 them ok and actually right now we're
01:42 gonna start using these macros right now
01:45 so this particular header here we wanted
01:49 to remember we're managing this header
01:51 and this subtitle inside of our CMS so
01:58 we're gonna use the text macro to bring
02:00 in the text for this particular title so
02:05 the syntax is percent CMS text
02:09 and then open parenthesis and then we're
02:11 gonna put in our CMS ID and if you
02:13 remember that was home underscore title
02:16 close parentheses and percent okay now
02:23 I'm going to preview this page and what
02:25 you'll notice is instead of seeing this
02:27 macro text we should see our page title
02:30 that we saved inside the CMS online and
02:33 there we have it I have the CMS content
02:36 that we saved online for this page title
02:40 now I'm gonna go ahead and do the same
02:42 exact thing for the page subtitle and
02:44 the header lower down on the page now
02:47 for this paragraph instead of using a
02:49 macro what I'm going to do is I'm going
02:50 to use this CMAs text stack here now the
02:56 reason I didn't use a macro here and I
02:57 used the tech stack instead is hip wig
03:01 which is our WYSIWYG editor takes care
03:04 of all the formatting and whatnot for us
03:06 so a lot of times when you're using hip
03:09 wig you just want to use the plain text
03:10 stack and let it do all the work for you
03:14 now next up we wanted to replace these
03:17 three images with a gallery so what I'm
03:23 gonna do is I'm going to add a gallery
03:25 stack to the page and if you remember we
03:28 set this Simas ID to the to be gallery
03:33 now thumbnails I definitely want square
03:36 max images let's say 20 is the maximum
03:39 that we're gonna display and sorting
03:41 actually want shuffle I just wanted to
03:43 display kind of random images that's
03:45 fine
03:46 and what I'm gonna do here is I want to
03:48 turn on featured image support I don't
03:51 want to show every image I only want to
03:53 show a certain number of images on the
03:54 page and then I want to frame my
03:57 thumbnails now the last we're gonna need
04:00 to determine how many thumbnails we
04:02 actually want to display and I'm just
04:04 gonna set it to 4 so we display 4 in
04:06 line 4 on tablet and then maybe 2 on
04:10 mobile ok so let's go ahead and preview
04:13 this page now so here we have it I've
04:15 preview the page and we have all of the
04:17 data that is configured and stored in
04:20 the CMS and pre
04:22 beautifully inside rapidweaver now with
04:24 featured image if you notice I can click
04:26 on an image and I have access to all the
04:28 images in my gallery so this is working
04:31 exactly how I expected it to so here we
04:35 are on the about Us page now I've
04:37 already configured the page headers to
04:39 be the macros for the about title and
04:42 the about subtitle but if you remember
04:44 in the content area we wanted to add a
04:46 video and then a news feed of basically
04:49 all of our team members so I'm go ahead
04:52 and add a video stack to the page and
04:55 configure my CMS ID to be about
04:57 underscore video which is what we set it
05:00 to and that should be it that's all we
05:03 need to do for that I'm gonna go ahead
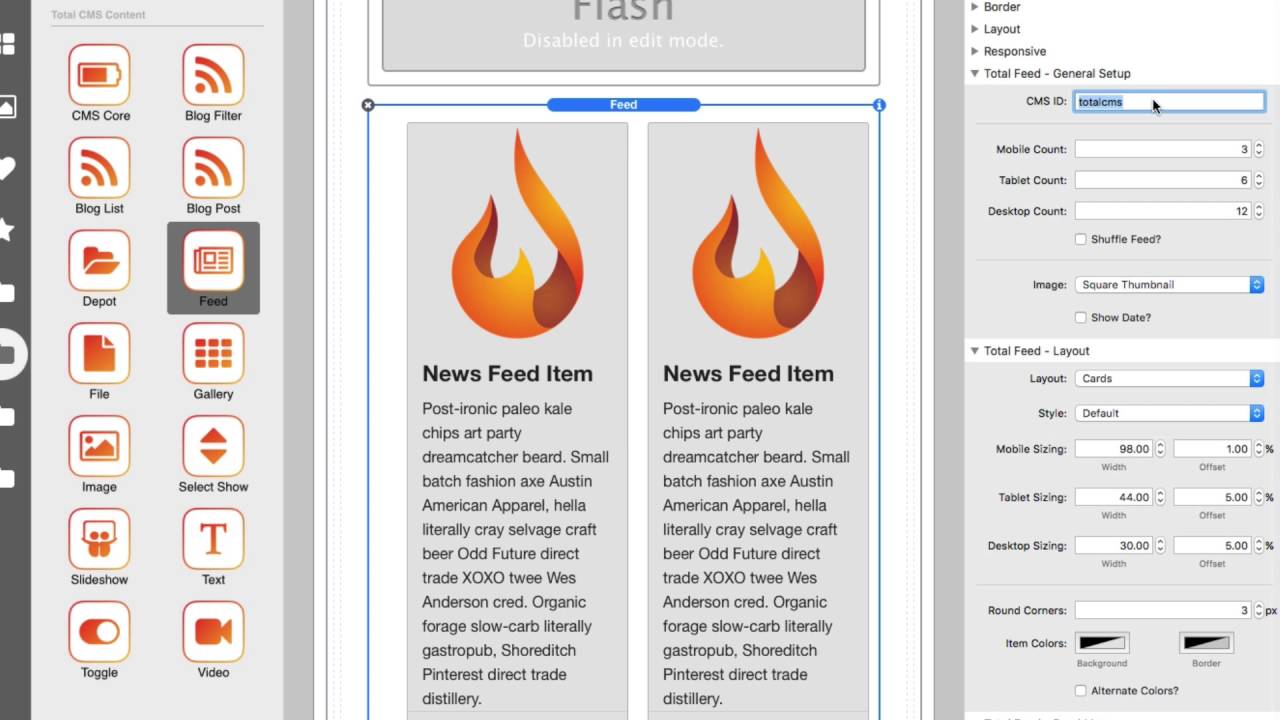
05:05 and add our feed now
05:07 that contains all of our team members
05:10 now when you add the feed item you'll
05:13 notice that the layout isn't exactly
05:15 what we wanted but we can tweak that so
05:17 let's go ahead and set the CMS ID to be
05:19 about us which is what I set the CMS ID
05:22 to be now for our layout we we don't
05:25 want the cards layout what we want is we
05:27 want a list layout and we want the image
05:31 alignment right let's set the width of
05:33 the image to be a little bit smaller so
05:35 20 and then we don't want this
05:38 background color we want to be
05:40 transparent so it just sees the
05:41 background so we're gonna click the
05:42 color and make that opacity of zero and
05:45 it's now completely transparent so
05:49 that's pretty much I think exactly what
05:50 we want and if we preview our page we
05:53 see that we have all of our content from
05:55 the CMS
05:56 we have the page title that we had saved
05:59 in those text areas we have this a video
06:02 that we save just by putting in a
06:03 YouTube URL and then we have all of our
06:06 feed items and again what's great here
06:09 is that we can add and remove as many of
06:12 these as we want and it will be added to
06:14 the list here this is very powerful and
06:17 it shows that we not only have to use
06:19 feeds for like a news feed sort of thing
06:22 but we can use it for a general layout
06:25 areas where we want our customers to be
06:27 able to add certain components to the
06:29 page next up is our Contact Us page and
06:33 that's just simple it's a simple few
06:34 text
06:35 that we I use the macro for the header
06:38 and then I used a CMAs text stack to
06:40 insert the paragraph here
06:41 pretty simple we've done that a couple
06:43 times already so I'm not gonna dive into
06:45 all of that but what I am gonna dive
06:49 into now is the site wide data right so
06:54 this icon our page title that is inside
06:57 top bar and then this text down here in
07:00 the footer
07:01 now our page title is configured inside
07:04 the rapidweaver general settings so you
07:07 see here it says getting started with
07:08 Foundation and what I'm gonna do here is
07:11 I'm actually just gonna insert the CMS
07:13 text macro now the CMS will manage this
07:17 title across all of the pages as long as
07:20 you have the CMS course stack on that
07:22 page now for the footer I'm gonna go
07:24 ahead and edit this partial and inside
07:26 this paragraph I'm just gonna go ahead
07:28 and use one of these CMS text macros
07:31 again for this area so again I just
07:35 insert this text macro and the CMS
07:37 course stack will now replace that macro
07:39 with the content from the CMS and what's
07:44 great with doing this inside of a
07:45 partial is this is now global across all
07:48 the pages that use that partial now the
07:52 next thing we need to edit is the image
07:54 so we're gonna go ahead and edit our
07:55 header partial here that contains this
07:58 image now this is just a normal
08:00 run-of-the-mill image stack and what
08:03 we're gonna do is we're gonna change
08:04 that to be a CMS image stack so I'm
08:08 gonna go ahead and take the CMS image
08:09 stack and drag that right in there
08:12 and if we click on the settings will see
08:16 that the CMS ID that we need to set is
08:18 site underscore logo and now I can
08:22 safely remove this image and now we have
08:26 our CMS logo okay that is managed by the
08:30 CMS on every page because it's inside
08:33 this partial so if we preview this page
08:35 again you'll see that we now have
08:37 instead of the macro we see the content
08:40 that is edited by the CMS we see the
08:43 image that is saved inside the CMS and
08:45 we also have the text that is in the
08:48 footer for the CMS as well so all I need
08:51 to do now is publish my project and I
08:53 have a fully customizable solution
08:56 online now just as a test let's go ahead
09:01 and look at our site settings and this
09:03 is no longer getting started with
09:04 foundation it's getting server with
09:06 foundation plus CMS let's go ahead and
09:10 save that and if we go back to our home
09:13 page will see that that title inside top
09:16 bar has changed to be getting started
09:18 with Foundation and CMS so I know I
09:22 whizzed through a lot of things here
09:24 right but we we took a static website
09:28 project and completely overhauled it to
09:32 use the CMS in like under an hour right
09:36 it's pretty astonishing now we used
09:39 feeds to dynamically add about us
09:42 content for our teams right we had a
09:44 video we can edit text we used partials
09:48 to leverage the same CMS content across
09:51 multiple pages right and what's so
09:55 powerful about total CMS is that we
09:57 built our site and integrated the CMS
10:00 content inside rapidweaver we didn't
10:03 have to publish our page to see it right
10:05 it all works inside rapidweaver
10:08 and that's important because you can
10:11 design your sites before you publish
10:15 them online and see all of the data
10:17 natively inside rapidweaver so again I
10:23 brushed over a lot of stuff here
10:24 hopefully you can go back and review it
10:27 and maybe pause and play around with
10:29 some things okay now we have individual
10:32 videos on every single one of the CMS
10:35 stacks so if you want to dive and learn
10:37 more about those individual settings in
10:39 each stack please go ahead and do that
10:41 we have lots of video on CMS now the
10:45 next video in this series is we're going
10:48 to be adding blog to this exact project
10:51 so we're gonna take it to the next level
10:54 and add a blog and some more dynamic
10:56 content the same exact project so make
10:59 sure you check out part 2 of
11:01 this video series on getting started
11:03 with Toro CMS see you then bye
11:13 you"}]
Search the page
0
