About Stacks Guru
Stacks Guru is born from the need to search the vast number of videos out there on stacks built for Stacks Pro and the Stacks 5 plugin for Rapidweaver.
We have scraped over 500 videos to get the transcripts for each in order to make the spoken word searchable.
Please use this free tool to help you learn and discover the awesome power that Stacks and the stacks made for Stacks have to offer.
Stacks Guru
Video Reference
WeaverCast 24 - Death to Spacer Stacks & the CSS Box Model
07/25/2016
OK. I don't want all spacer stacks to die but they are definitely overused 99.9% of the time. In this episode, I review a few scenarios where spacer stacks are overused. I then show you how to can accomplish the same thing with features that are built into every single stack… Margins! I then do a full review of the CSS Box model: padding, borders and margins. We show real world examples on how to use theme settings to your advantage. Show Links * Show Notes - http://docs.joeworkman.net/weavercast... * Sample project -http://jwurl.net/1j8fhW3 * Target Stack - http://joeworkman.net/rapidweaver/sta... * Will Woodgate’s Spacer Stack - http://stacks4stacks.com/spacerOK. I don't want all spacer stacks to die but they are definitely overused 99.9% of the time. In this episode, I review a few scenarios where spacer stacks are overused. I then show you how to can accomplish the same thing with features that are built into every single stack… Margins
Transcript
00:04 and hello everyone welcome to Weaver00:08 cast we were cast is a regular podcast
00:10 where we go over tips and tricks for
00:13 rapidweaver and web design I am Joe
00:15 workman your host I'm an indie mac and
00:17 web developer based in the San Francisco
00:19 Bay Area this is going to be shown over
00:22 24 it's Thursday April 24th and Weaver
00:26 cast is never longer than 15 minutes so
00:28 let's get started so today we're going
00:32 to go over some really cool stuff uh
00:33 some stuff that I see a lot of people
00:36 kind of doing wrong right I get you know
00:39 people send me their projects I see what
00:41 they do and I go oh why do you do that
00:43 oh and and the bone I'm gonna pick today
00:46 is the vast overuse of the spacer stack
00:51 now there's many spacers tax out there
00:53 and I don't want to say you could
00:54 completely trash share from your system
00:56 but most people the way they use it like
00:59 ninety-nine percent of the time you
01:00 don't need it I mean because all those
01:03 features are just built into every
01:04 single stack you don't need the spacer
01:07 stack now we'll Woodgate has one of his
01:11 spacer stack actually has a couple nice
01:12 little features like it you can do like
01:14 percentage height and I can see that
01:17 again like maybe one percent of the time
01:19 where you could potentially want that
01:21 but most the time just adding space to
01:24 your page and pixels is not needed
01:27 because again you can do that with
01:29 everything with every stack you have
01:31 that ability built in so um it also has
01:36 less clutter on the page less space your
01:38 stacks less clutter less text on the
01:40 page things move a little bit nicer the
01:41 easier to work with so without further
01:44 ado let's jump on in and see what I'm
01:47 talking about so let's start off by
01:52 showing you a few examples of use cases
01:54 that I see the most for the spacer stack
01:57 in this top example will see that I have
02:01 an image and then I have some text over
02:03 on the right in a two column stack now a
02:06 lot of times people want to actually you
02:08 know lower the amount of text so that
02:10 the kind of maybe the top of the image
02:12 lines up nicer with
02:13 text so a lot of times what they'll do
02:15 is the oddest space or stack above it
02:18 let's look at that in preview so as we
02:21 see here the text is actually brought
02:24 down now how can we do this without
02:28 actually using the space or stack let's
02:30 go ahead and remove the spacer stack and
02:33 if we look here my text is way above the
02:36 image and I don't want that so what we
02:40 could do is we can easily add built-in
02:42 features that are in every single stack
02:44 and that's called margins and padding so
02:49 essentially what we want to do is we
02:50 want to add a top margin so we were to
02:53 add let's say 40 pixels okay to the top
02:57 of this section will notice that we have
03:00 exactly what we had with our spacer
03:03 stack we have now lowered our text by 4
03:07 pixels and we've only done it within the
03:11 actual text stack I didn't need to add
03:13 any new stacks on the page to accomplish
03:15 this it it's all built into every single
03:19 stack now what you'll notice with the
03:22 margin settings inside the stacks is
03:24 that I clicked on the detailed margin
03:27 settings this allows me to actually
03:29 provide exact pixel dimensions that i
03:31 want for top bottom left or right if i
03:35 didn't check this box essentially the
03:36 setting would apply margins to all four
03:39 sides so by default if iris live is all
03:42 the way to the right I would get a 2
03:44 pixel margin so a 20 pixel space around
03:47 the outside of my stack around the top
03:50 bottom left and right but in this
03:54 situation we only want to adjust the top
03:56 so you click on detailed margins and
03:58 this allows us to actually set the 4
04:02 pixel margins to just the top part of
04:04 our paragraph and that's exactly what we
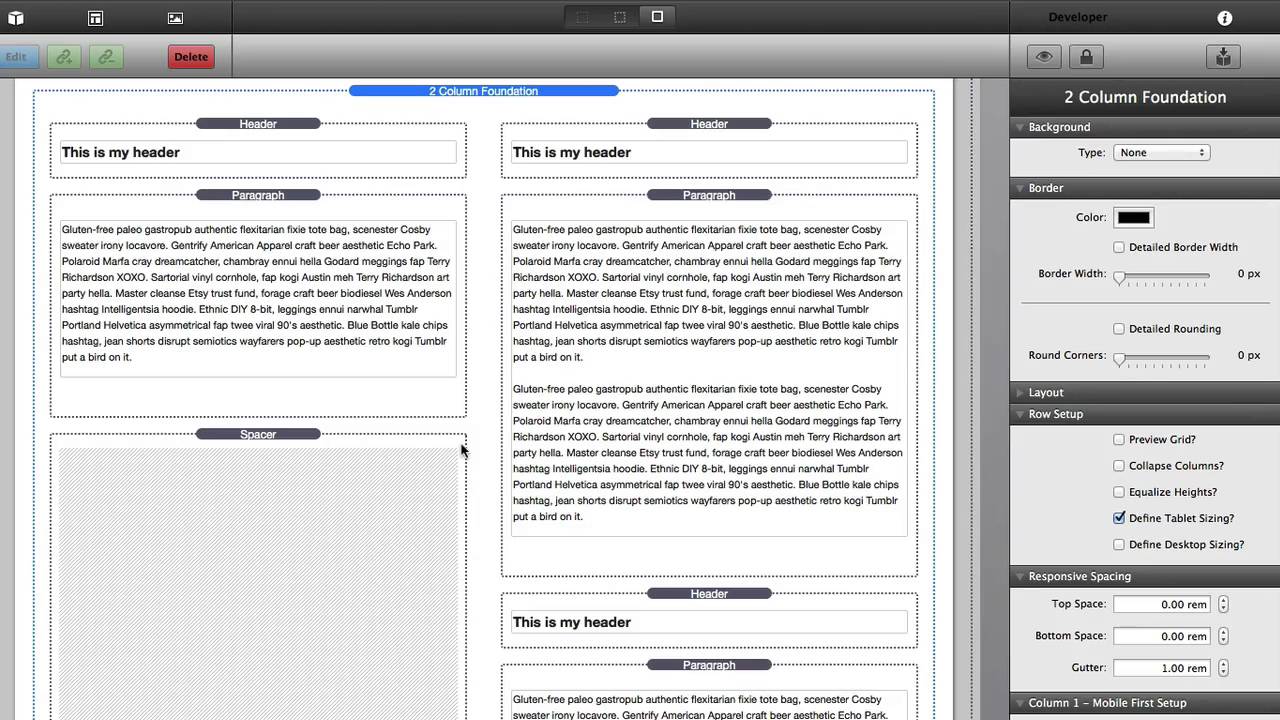
04:08 wanted now in the second example I have
04:11 two columns of text and a lot of times
04:15 people will have multiple sections of
04:18 text and they want the bottom sections
04:20 to line up so if we look at this in
04:23 preview will notice that I have a
04:25 a section of text at the top and my text
04:28 on the right is a little bit longer and
04:30 then however I want a my second sections
04:33 below it to actually line up so I want I
04:36 want my headers to line up here and what
04:39 people do is they'll put a spacer stack
04:40 right here in order to make sure that
04:43 they're the text and their bottom
04:44 sections line up properly this is not
04:47 the way you want to do it and ultimately
04:49 really why you want don't want to do
04:51 this is if this was a responsive site
04:54 anywhere to shrink down to a mobile
04:57 basically this you have a huge white
05:00 space on your mobile phone because the
05:04 spacer stack is going to take up in this
05:06 case I think 300 pixels so how do we fix
05:11 this essentially what we want to do is
05:14 we want to delete the space your stack
05:17 obviously and then what we're going to
05:19 do is we're going to create a new two
05:23 column stack below this so what i've
05:26 done here is i've actually added a
05:28 second two column stack below my
05:30 original two column stack and then
05:33 inside that second two column stack i've
05:35 added the other sections of text and
05:38 what this will do is it'll actually line
05:40 these up perfectly so as you see when we
05:43 look at this in preview we have our top
05:46 two columns are nicely displayed and our
05:50 bottom two columns of text are lined up
05:52 exactly the way we want them no space
05:55 your stack required and what's great
05:56 with this layout is in a mobile device
05:59 in a responsive design all these texts
06:02 will flow nicely underneath each other
06:04 so that you won't have any extra white
06:06 space now earlier I had shown you how we
06:11 can adjust margins to add spacing around
06:14 a stack I didn't really go over padding
06:17 and what is the difference between
06:18 margins and padding and when should you
06:21 use what well to understand this more
06:24 let's jump into the CSS box model now
06:28 here is a common diagram that you may
06:30 have seen if you use the Safari dev
06:32 inspector and this is called this CSS
06:34 box model and every single stack up
06:38 to this rule in this diagram we notice
06:42 in the center we have our content in
06:45 this example it's a 100 by 100 pixels
06:48 square okay and then after your content
06:52 the padding is what is added after that
06:56 so if we wanted to add 10 pixel padding
06:59 it would add uniformly to the content
07:03 outside of the padding is then the
07:06 border so whatever pixel dimensions that
07:09 you add to the border will be added to
07:12 the outside of the padding then we have
07:16 margins and the margin lands outside of
07:19 the border okay so if we add a border
07:25 and we want to add spacing out side of
07:28 the border of a stack we would need to
07:30 add a margin okay now outside of the
07:33 margin is something called offsets and
07:36 offsets aren't actually defined within
07:39 stacks it's not something neat that you
07:41 can set however there are stacks out
07:44 there such as my target stack that
07:46 actually allow you to do these offsets
07:49 and this is where you can actually
07:50 define the positioning so you can
07:52 actually move it you know five pixels to
07:54 the left or actually you'll make it
07:56 relative to the browser and add a top
07:59 position and left positioning and things
08:02 of that nature so offsets are kind of a
08:05 a specialized thing and check out my
08:09 target stack if that's something that
08:10 you're interested in however everything
08:13 else is done within every single stack
08:16 has this ability obviously the the
08:19 content size of your content is defined
08:22 by what you add to the stack then you
08:26 can add padding around that which is
08:29 contained within a border which then you
08:34 can add space around that border for
08:36 margins let's see this in action so here
08:40 I've added just a plain vanilla simple
08:43 text stack to the page okay now to see
08:47 the area content area a little bit
08:49 easier what we're going to do is we're
08:51 going to add a
08:51 background color so just make the
08:54 background color gray so that's a little
08:56 bit easier to see what we're doing here
08:59 now right now my text takes the entire
09:02 width of my box right if we preview this
09:05 will notice that the text takes up the
09:08 entire width and height and we have no
09:11 you know nice background border it's not
09:14 very attractive so we can fix that
09:16 really easily just by simply adding some
09:19 padding I'm also going to go to this
09:24 view mode to make it a little bit easier
09:25 to see so what I'm going to do is I'm
09:27 going to increase the padding here and
09:30 as we see as I increase the padding to
09:34 20 pixels we have are basically our
09:37 content is shrunk down by 20 pixels and
09:40 we now have a 20 pixel border between
09:42 our padding between the our edge of our
09:46 content area and our actual content ok
09:50 so if we preview this now we'll see that
09:52 we have a nice border around our content
09:56 now let's go to the next level right
09:59 let's go ahead and let's say we want to
10:02 add some margins actually let's go ahead
10:07 and add the border because we said the
10:08 next level was border so now we have a
10:11 border ok so I go ahead and in my stacks
10:14 let's set our border to be four pixels
10:17 and black ok so this adds a border
10:22 around our padding area of four pixels
10:27 and the color is set to black now
10:31 obviously if we want to add more space
10:34 outside of the border and this is
10:36 basically if we wanted to have multiple
10:37 stacks and have some space between them
10:39 we would have margins so we could add a
10:43 margin of let's say 20 pixels now if we
10:47 didn't have any border at all if we set
10:49 the border 20 basically we would have a
10:53 padding of 20 pixels of our content and
10:56 then a margin of empty space blank space
11:00 around our content area which includes
11:04 the padding
11:05 now let's see how we can use margins to
11:08 actually apply spacing between our items
11:11 Sarah have the same boxes I've copied
11:13 and pasted it and I've removed all the
11:16 margins and if we preview this will
11:18 notice that our boxes that we created
11:20 are butted up right next to each other
11:23 that doesn't look very attractive so
11:29 what we can do is we can simply add some
11:31 margins and I'm going to add a 20 pixel
11:35 margin around each stack and will notice
11:38 that we now have some marginal along the
11:41 side and we have some nice space in
11:44 between and as I've shown you before if
11:47 you actually want to customize and do
11:49 some detailed margins you can easily do
11:51 that by clicking on the detailed margins
11:53 then you can set how much pixels you
11:55 want on the top bottom left and right so
11:58 let's say on the top and bottom we
12:00 wanted 40 pixels all right let's say
12:02 let's say 20 pixels and on the left and
12:06 right we wanted 40 pixels ok you can
12:10 then easily you know manipulate exactly
12:13 what you want in terms of the margins
12:15 now this is also available the detail
12:18 border with and detail paddings if
12:20 that's something that you need well I
12:23 hope you enjoyed this podcast everyone
12:25 today you know hope you look like the
12:27 CSS box model use it learn it love it it
12:30 is there it's available in every single
12:33 stack right so you know make your stacks
12:36 page a little bit cleaner dont have
12:37 space your stacks everywhere use margins
12:39 use paddings to your benefit so as
12:43 always if you have any questions
12:44 comments concerns I'm at Joe workman on
12:47 all the various Internet's Twitter
12:49 app.net you can always reach us at
12:51 support at Joe workman net and please
12:54 send us your show ideas we always want
12:57 to know what you want to learn so help
12:59 us out there and as always if you are
13:01 subscribing to this on iTunes go ahead
13:04 and leave a review or two uh well I
13:06 guess you can't we leave too huh so
13:08 leave a review I love it I guess some
13:11 star ratings going on that would be
13:13 awesome so I hope you have a great day
13:15 everybody as always check out my great
13:18 because they bring these podcasts to you
13:21 for free Joe or koonet great Mac and
13:23 wrap Weaver add-ons do it now go thanks
13:27 have a great day bye
13:37 you"}]
Search the page
0
